Lovely Lively Lemon Curd

Happy August Readers!

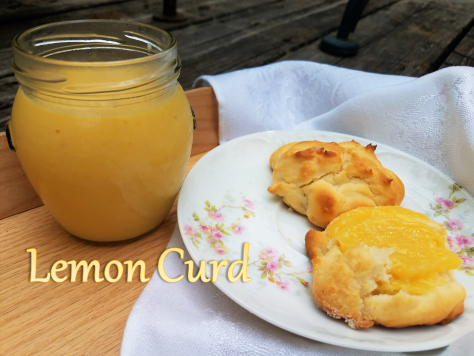
I’ve been thinking a lot about lemons lately – lemon scones, lemon thyme cookies, and most of all – Lemon Curd! I first tried lemon curd in a hostel in Edinburgh, right before a bus trip through the Glencoe Mountains to Loch Ness. Skyfall was being filmed while we drove through and I think I managed to get a glimpse of the helicopters doing panoramic shots. It was a fabulous trip – we saw the castle from Monty Python and the Holy Grail, Highland Cows, the Commando Memorial, and of course Loch Ness itself. Loch Ness was gorgeous, despite the freezing drizzle that day. I’d go back in a heartbeat.

This slideshow requires JavaScript.

Anyways, this hostel had breakfast until noon, so I tried lemon curd on toast and I was hooked. It was sublime, especially when mixed with raspberry and apricot jam. Very sweet, but perfect when paired with peaty Scottish Breakfast Tea.

When I returned to Minnesota, I was determined to replicate what I’d had in Scotland. I gave up on store bought fairly quickly and resorted to testing out my own recipes, since most of the very few versions available at the grocery store tasted more like overcooked eggs than lemons.  After all, when I want lemon curd, I want something sweet and tangy, not eggy.
20180811_135351

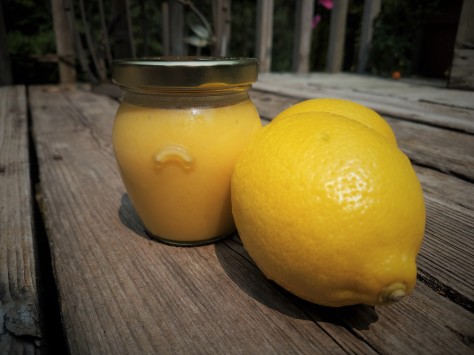
The recipe I’ve come up with ditches the traditional whole eggs in place of just the egg yolks. While this will produce less curd overall, it will reduce the need for straining, as there will not be the odd piece of cooked white floating around after heating. I’ve added less sugar as well, as I like my curds to be more acidic than sweet. In my experiments, I’ve found that honey will work just as well as white or turbinado sugar, but you may need to add more or less to suit your taste.

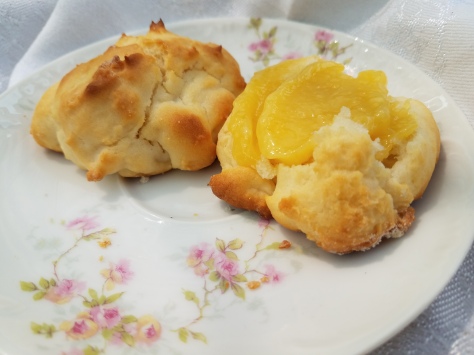
The finished product must be refrigerated, but freezes well in a sealed container. When you run out of the first jar, place the frozen one in the refrigerator overnight to thaw. I haven’t noticed a textural difference, but if you find it to be runny after thawing, repeat step two of the recipe below until you achieve your desired texture.
20180811_135545.jpg

Recipe

  • 2 large Lemons, zested and juiced
  • ¼ – ½ c Granulated Sugar, depending on your taste OR 1/3 c Honey
  • 3 Egg Yolks
  • 6 Tbsp Butter, cubed

Procedure

  1. In a medium sized sauce pot, whisk together sugar, lemon juice and zest, and egg yolks until the mixture turns pale yellow.
  2. Cook, stirring constantly, until the mixture thickens enough to coat the back of a spoon without running together.
  3. Remove from heat and stir in butter until the curd is smooth and even.
  4. Transfer to containers and refrigerate or freeze.
  5. Enjoy!

Lemon Curd Title Card

That’s it for now gentle readers. Give it a whirl!

Sunshine Meringues

Hello Readers!

Cold weather and grey skies got you down? I have just the solution:

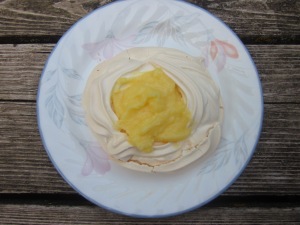
Admittedly not the best picture, but hey - It tastes delicious!

Admittedly not the best picture, but hey – It tastes delicious!

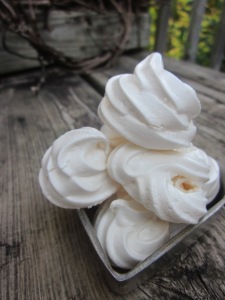
Sunshine Meringues!

Now, I’m not much for frilly names and froufrou titles (unless it’s the band), but I really think “sunshine” describes these treats perfectly.

So, what are they?

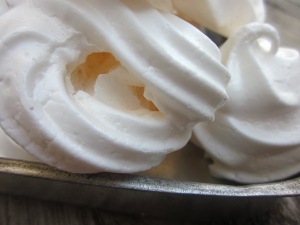
Simply meringues filled with pineapple curd! It’s an excellent use for the curd and the egg whites left over when making it. It’s light and crispy on the outside and creamy and tart on the inside – perfect for parties or just dessert.

Meringues are very simple to make. You just have to make sure it’s just egg whites with no yolk, or the meringue won’t form properly.

The pineapple curd recipe is from Alaska From Scratch, and boy, is it amazing!

Onward!

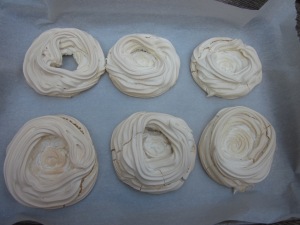
First, make your nests. Make one recipe basic meringue and place it in a pastry bag. You can also use a plastic bag with the corner cut off. I like using a pastry tip, too, but you don’t have to.

IMG_0256

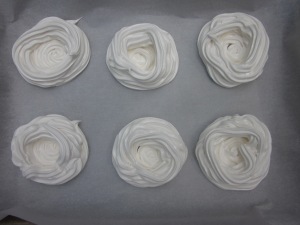
Next, pipe out circles on a parchment paper lined baking sheet. Make sure to make them solid circles. Pipe another circle on top of each one, leaving the center open.

IMG_0254

Bake for one and a half hours at 275°F. Turn the oven off and let them stay in the oven another hour with the door closed. Remove and keep of the cookie sheets for another two hours before filling.

IMG_0268

While the meringues are baking,prep your pineapple curd. I used canned pineapple for this, but if you have a fresh pineapple use that!

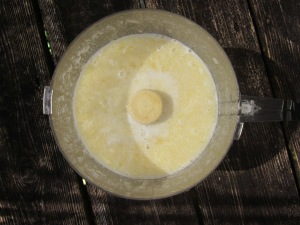
In the bowl of a blender or a food processor, puree pineapple until you get a texture you like. Toss it into a saucepan. Over low heat and cook until bubbling.

IMG_0230

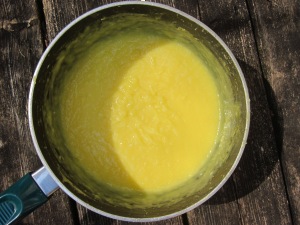
Whisk together egg yolks, sugar, corn starch, and salt. Temper the mixture with small amounts of the hot pineapple puree, whisking to keep the egg yolks from curdling. Once tempered, whisk into the remaining pineapple puree.

IMG_0235

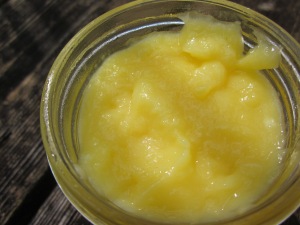
Cook mixture until it comes to a boil. Remove from heat and stir in butter. Transfer to clean storage jars.

IMG_0238

Once the meringue nests have cooled, use a pastry bag or a spoon to fill the centers with pineapple curd. Keep refrigerated until ready to serve.

Sunshine Meringues

Ingredients

1 recipe Pineapple Curd

1 Recipe Basic Meringue

Procedure

  1. Preheat oven to 275°F. Line a cookie sheet with parchment paper.
  2. Transfer meringue to a pastry bag. Pipe out circles onto the parchment paper. To form the nest walls, pipe a second layer of circles on top, making sure to leave the center open.
  3. Bake for 1 ½ hours, then turn the oven off.  Keep meringues in the oven another hour with the door closed. Cool on cookie sheets another 2 hours.
  4. Using a spoon or pastry bag, fill nests with pineapple curd. Refrigerate until ready to serve.
  5. Enjoy!

Pineapple Curd

Ingredients

1 c Pineapple Puree

1/3 c Sugar

3 Egg Yolks

2 Tbsp Corn Starch

2 Tbsp Butter

Pinch Salt

Procedure:

  1. Heat pineapple curd in a large saucepan until bubbling.
  2. Whisk together egg yolks, sugar, cornstarch, and salt. Temper and whisk into the pineapple puree. Heat until it comes to a boil and remove from heat.
  3. Stir in butter.

Cooking Lessons from Kylie: Basic Meringue

Hello Readers!

I’ve been teaching high school cooking classes lately, and it’s gotten me thinking about basic cooking skills. Specifically, skills that people think are difficult and make a point to stay away from, but are actually super easy.

Number one on this list is meringue. Mostly because I have a ton of egg whites sitting around due to making curds, but hey, it’s as good a starting point as any!

IMG_0278

Oh, how I love meringue – it’s dreamy appearance, melt in the mouth texture, and the overall versatility of the medium all combine to make me smile. And a smile is always a good thing, right?

Simple!

So I decided to share the recipe I use and break it down. Follow along and I bet you’ll fall in love with it too!

First start with egg whites. You want them to be completely free of yolk or the meringue won’t form. Why? Let’s ask my food science background:

When making meringues, the most important part of the egg white is the proteins found in it. Proteins are made of hydrophilic (water loving) and hydrophobic (water fearing) molecules – basically, one attracts water and one repels it. When you start beating air into your egg whites, the hydrophilic molecules jump up and cling to the water present in the egg white (about 90 percent of it!) and the hydrophobic molecules run straight into the waiting arms of the air molecules. This helps form air bubbles and puffs the meringues up. However, if the egg yolk, which contains fat molecules, is included, the fat molecules butt in and stop the bubbles from forming. No bubbles, no meringue.

Add your egg whites to a metal bowl. Don’t use a plastic one, because no matter how well you cleaned it last time you used it, it might still have a couple of fat molecules hanging around. Next, add in cream of tartar or another acid.

Remember those bubbles I was talking about before? Well, as we all know, bubbles eventually pop, which will lead to a deflated and gross meringue. Add an acid, such as cream of tartar, and bam – stable, no pop bubbles.

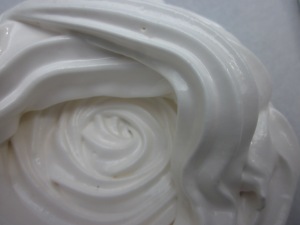
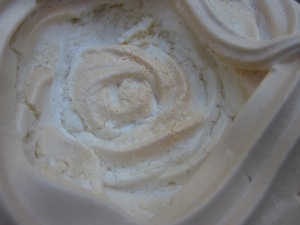
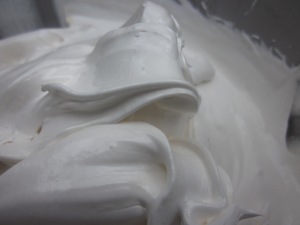
Look close! Can you see the bubbles?

Look close! Can you see the bubbles?

Beat the egg whites and cream of tartar together at high speed until foamy. It’ll take a while, but be patient. The wait is well worth the reward.

IMG_0243

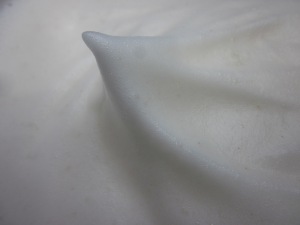
Once your meringue has reached a nice foamy stage, start adding sugar. I recommend going one tablespoon at a time. Keep beating until the mixture is thick, glossy, and forms stiff peaks. To determine if your meringue is ready, give it a stir and lift up the whisk or beater. If the resulting folds in on itself but has a nice pointy tip, it’s ready. Don’t over beat!

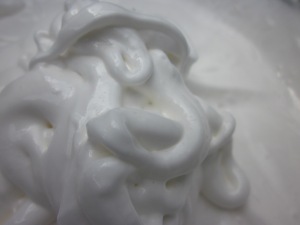
The picture below isn’t quite there yet.

Not Ready

This is better:
IMG_0249Once your meringues have reached this stage, transfer (gently!) to a pastry bag. I don’t have a pastry bag, so I use a Ziploc with the corner cut out. If you have a pastry tip, you can use that to make it pretty, but it’s not necessary. Pipe your meringues out onto a parchment paper lined cookie sheet and bake. Don’t peek! Turn the oven off after an hour and a half at 275°F, then leave them in for another hour or so. Meringues are sometimes called “forgotten cookies” because they can be left in the oven for a while after finishing.

IMG_0255

As it says above, this is a recipe for basic meringues. You can add flavoring (ginger, anyone?), mini chocolate chips, dried fruit, nuts – It’s an open canvas! This can also be used as a base for Pavlova, Baked Alaska, Meringue Pies, and Eaton Mess, among many tasty others.

Enjoy!

IMG_0273

Basic Meringue

Ingredients

3 Egg Whites

¼ tsp Cream of Tartar

¾ c Sugar

Procedure

  1. Preheat oven to 275°F. Line a cookie sheet with parchment paper,
  2. In a medium bowl, beat together egg whites and cream of tartar on high speed until foamy.
  3. Beat in sugar, 1 tablespoon at a time and continue beating until stiff peaks form and the meringue is glossy. Do not under beat.
  4. Transfer meringue into a pastry bag or a Ziploc bag with a corner cut off. Pipe out as desired.
  5. Bake for 1 hour and 30 minutes. Turn off oven and leave door closed 1 hour. Finish cooling outside the oven for 2 hours.

Coconut Cashew Chicken

Hello Readers!

The farm I work at recently gave away some of the older laying chickens, and that got me thinking about chicken. Not just eggs, but the meat.

Now, I don’t cook a lot of meat. Mostly, it is because I am lazy and by the time dinner comes around, vegetables seem like the quicker option. Also, buying meat seems like a pain in the neck to me – once again – Vegetables!

However, like I said above, I work on a farm. It’s a nice farm, part of a park district. We raise chickens for meat and eggs, sheep for meat and wool, pigs, turkeys, and beef cattle. I’m the local food coordinator, so I do more with the gardens and community outreach, but I still like hanging out around the animals.

IMG_0625

But back to chicken.

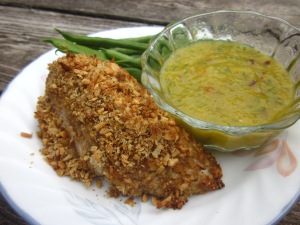
This is a recipe I stumbled upon on Carlsbad Cravings this summer and fell in love with! It’s tropical and tasty and just what I needed at the time. And the dipping sauce is to die for – I admit I ate most of it with a spoon.

IMG_0286

I will admit that this recipe made me extremely grateful to have a food processor-  press the button and whir thunk bam – ingredients are chopped or pureed in seconds.

Onward!

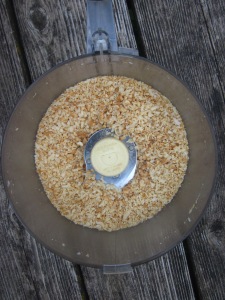
First combine the cashews and the coconut in the bowl of a food processor. You could also use a blender, or a knife if necessary. Pulse until the mixture forms small chunks.

IMG_0264

Next prep your dredging station. Place the flour in a shallow dish and set in spot number one. Depending on which hand you work with, this will be the farthest right or left. Combine eggs and lime juice in a separate bowl and place in spot number two.  The coconut/cashew mixture goes in another shallow dish with the bread crumbs, brown sugar, and spices. Put a parchment paper lined baking sheet at the end of the line.

IMG_0267

Working one at a time, dip the chicken in the flour, then the eggs, and then the breading. I’ve found that using one hand for the flour and egg and one hand for the breading works best and doesn’t result in gooey hands. Gross.

Bake the chicken at 400°F for about twenty five minutes, or until the juices run clear.

While the chicken is baking, clean out your food processor/blender/etcetera. Peel and roughly chop your mango. If you haven’t worked with mango before, my favorite chef, Alto Brown has a pretty good tutorial here. Put the mango chunks into the bowl of the food processor and puree with the lime juice, cider vinegar, and spices.

IMG_0282

Enjoy!

Coconut Cashew Chicken

Ingredients

Chicken

2 lbs Chicken Tenderloin

2 eggs

1 Tbsp Lime Juice

¾ c Whole Wheat Flour

1 c Cashews, roasted without salt

¾ c Shredded Coconut

1 c Bread Crumbs

1 Tbsp Brown Sugar

1 ½ tsp Garlic Powder

1 tsp Onion Powder

1 tsp Cumin

1 tsp Salt

½ tsp Pepper

1 tsp Cayenne Pepper

Mango Honey Dip

2 Mangos, peeled and chopped

¼ c Honey

2 Tbsp Lime Juice

2 Tbsp Cider Vinegar

½ tsp Cumin

4 Cloves Garlic

3 Green Onions, chopped

2 tsp Red Chili Flakes

Procedure:

  1. Preheat oven to 400°
  2. In the bowl of a food processor, mix together cashews and coconut. Pulse until roughly the size of the bread crumbs.
  3. Combine coconut and cashew mixture, bread crumbs, brown sugar, and spices in a shallow dish and stir together to combine to form the breading.
  4. Place flour in a separate shallow dish and place next to the breading.
  5. Place eggs and lime juice in a bowl and whisk to combine. Place bowl beside the flour. You should now have an assembly line set up of flour, eggs, and breading.
  6. Working one at a time, dip chicken tenderloins in the flour, then the egg, then the breading and place on a parchment paper lined baking sheet. Press the breading gently against the chicken to make sure it sticks.
  7. Once each tenderloin has be coated, place in the oven and bake for about 25 minutes, or until juices run clear.
  8. While the chicken is in the oven, place mango into the bowl of the food processor and puree.
  9. Add honey, lime juice, cider vinegar, and spices and puree again. Pour into serving bowls.

Freeform Strawberry Blueberry Pie

Hello Readers!

It’s summer, and summer at my house means PIE!

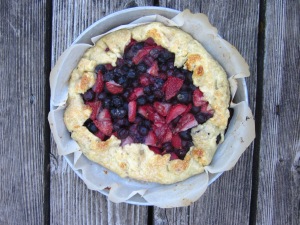
IMG_0187

I love pie – I personally think it’s better than cake. Well, when made the right way with fresh fruits, or in the case of rhubarb, veggies, anyway. I do make an exception for pumpkin pie.

Anyways, blueberries and strawberries have been rolling into the house, and I stumbled upon this delicious recipe in one of the Sunday paper inserts. The original recipe can be found here.

IMG_0190

I like that the pie crust is free form and doesn’t overwhelm the fruits, plus, the crust is made with lemon juice and lemon zest! This recipe could be easily modified to use other types of fruits or zests in the crust – so I predict many variations of it gracing my table this summer. It’s also quite small, so it’ll go fast!

Onward!

Delicious!

Delicious!

Start by making your pie crust. I used a food processor, but you could easily make the dough by hand with a pastry blender or a pair of forks.

In a measuring cup, combine lemon juice with enough ice water to make ¼ of a cup. Keep cold and set aside.

In a medium sized bowl, combine lemon zest, flour, and salt. Add in butter in small chunks and mix with a food processor or pastry blender until it resembles coarse meal with pea sized chunks. Drizzle the lemon water in and pulse or stir until the dough just comes together.

Form the dough into a flattened disk, wrap in plastic wrap, and chill for at least half an hour.

While the dough is chilling, preheat your oven to 450°F. Prepare an eight inch round baking pan by greasing and lining with parchment paper. Set aside.

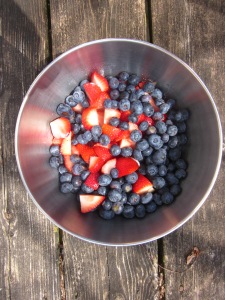
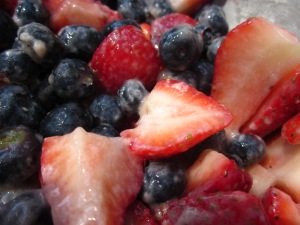
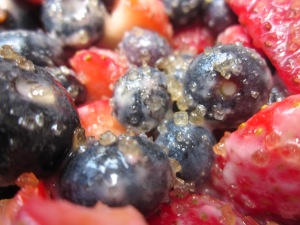
In a large mixing bowl, combine strawberries and blueberries with 2 Tbsp each of flour and sugar. Toss to combine and set aside. You could also add in some additional lemon zest here.

IMG_0195

Once dough has chilled, roll it out into a twelve inch round. Place the dough gently into the baking pan, with edges going over the sides. Pour the berry mixture into the center of the soon-to-be crust, making sure to keep a two inch border around the edges.

IMG_0199

Fold the dough over the berries, pleating the edges to keep them inside. Brush dough with egg white, and sprinkle the entire pie with turbinado sugar.

IMG_0202

Place baking dish on a cookie sheet to prevent any leaks into the oven, and bake at 450° for 15 – 25 minutes, or until the crust is golden.

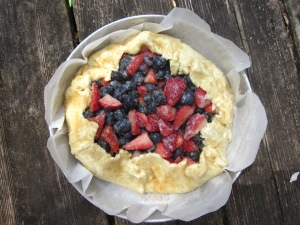
Serve warm or at room temperature. Add ice cream if you’d like and enjoy!

IMG_0211

Freeform Strawberry and Blueberry Pie

Ingredients:
For the Crust:

Juice and Zest of one Lemon

1 ½ c All Purpose Flour

½ tsp Salt

½ c (1 stick) Butter

For the Filling:

1 lb Strawberries, hulled and sliced into fourths

1 ½ pints Blueberries

2 Tbsp Sugar

2 Tbsp Flour

1 ½ Tbsp Turbinado Sugar

1 large Egg White


Procedure:

  1. Combine the lemon juice with enough ice water to make ¼ cup lemon water.
  2. In a large mixing bowl, or the bowl of a food processor, combine flour, salt, and lemon zest. Add in butter in small chunks and mix until pea sized lumps remain.
  3. Drizzle in lemon water and mix until dough just comes together.
  4. Scrape dough onto your work surface, form into a flattened disk, and wrap in plastic wrap. Chill for at least a half hour.
  5. Prepare an 8” round baking pan by greasing and lining with parchment paper. Set aside.
  6. In a large mixing bowl, combine remaining 2 Tbsp flour, 2 Tbsp Sugar, and fruit. Toss to combine.
  7. Place chilled dough on a floured surface and roll out into a 12” round. Transfer to baking pan.
  8. Pour berry mixture onto the pie dough, leaving a two inch border around the edges. Fold crust over berries, pleating to make sure the berries stay inside.
  9. Brush dough with egg white. Sprinkle turbinado sugar over dough and fruit.
  10. Place baking pan on a cookie sheet and bake at 450°F for 15 – 25 minutes, or until crust is golden.
  11. Serve hot or at room temperature, and enjoy!