Lovely Lively Lemon Curd

Happy August Readers!

I’ve been thinking a lot about lemons lately – lemon scones, lemon thyme cookies, and most of all – Lemon Curd! I first tried lemon curd in a hostel in Edinburgh, right before a bus trip through the Glencoe Mountains to Loch Ness. Skyfall was being filmed while we drove through and I think I managed to get a glimpse of the helicopters doing panoramic shots. It was a fabulous trip – we saw the castle from Monty Python and the Holy Grail, Highland Cows, the Commando Memorial, and of course Loch Ness itself. Loch Ness was gorgeous, despite the freezing drizzle that day. I’d go back in a heartbeat.

This slideshow requires JavaScript.

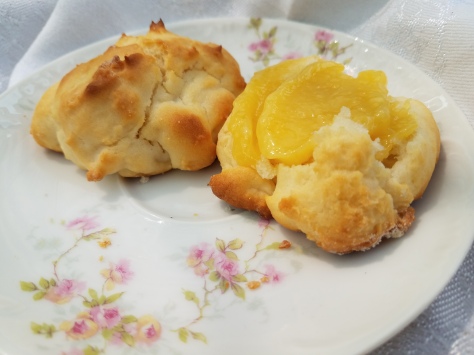
Anyways, this hostel had breakfast until noon, so I tried lemon curd on toast and I was hooked. It was sublime, especially when mixed with raspberry and apricot jam. Very sweet, but perfect when paired with peaty Scottish Breakfast Tea.

When I returned to Minnesota, I was determined to replicate what I’d had in Scotland. I gave up on store bought fairly quickly and resorted to testing out my own recipes, since most of the very few versions available at the grocery store tasted more like overcooked eggs than lemons.  After all, when I want lemon curd, I want something sweet and tangy, not eggy.

20180811_135351

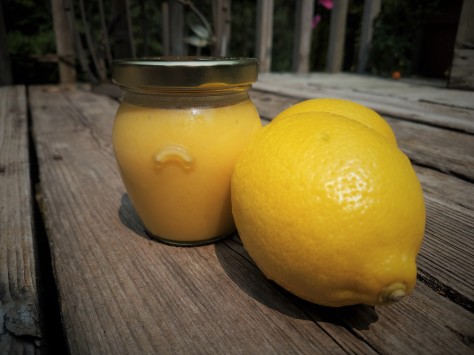
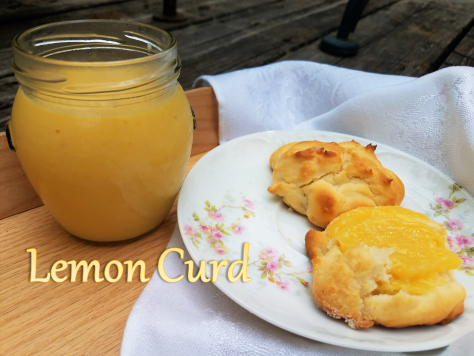
The recipe I’ve come up with ditches the traditional whole eggs in place of just the egg yolks. While this will produce less curd overall, it will reduce the need for straining, as there will not be the odd piece of cooked white floating around after heating. I’ve added less sugar as well, as I like my curds to be more acidic than sweet. In my experiments, I’ve found that honey will work just as well as white or turbinado sugar, but you may need to add more or less to suit your taste.

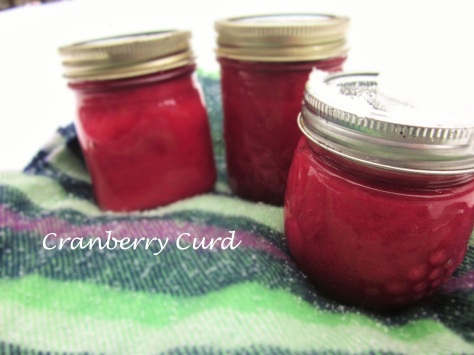
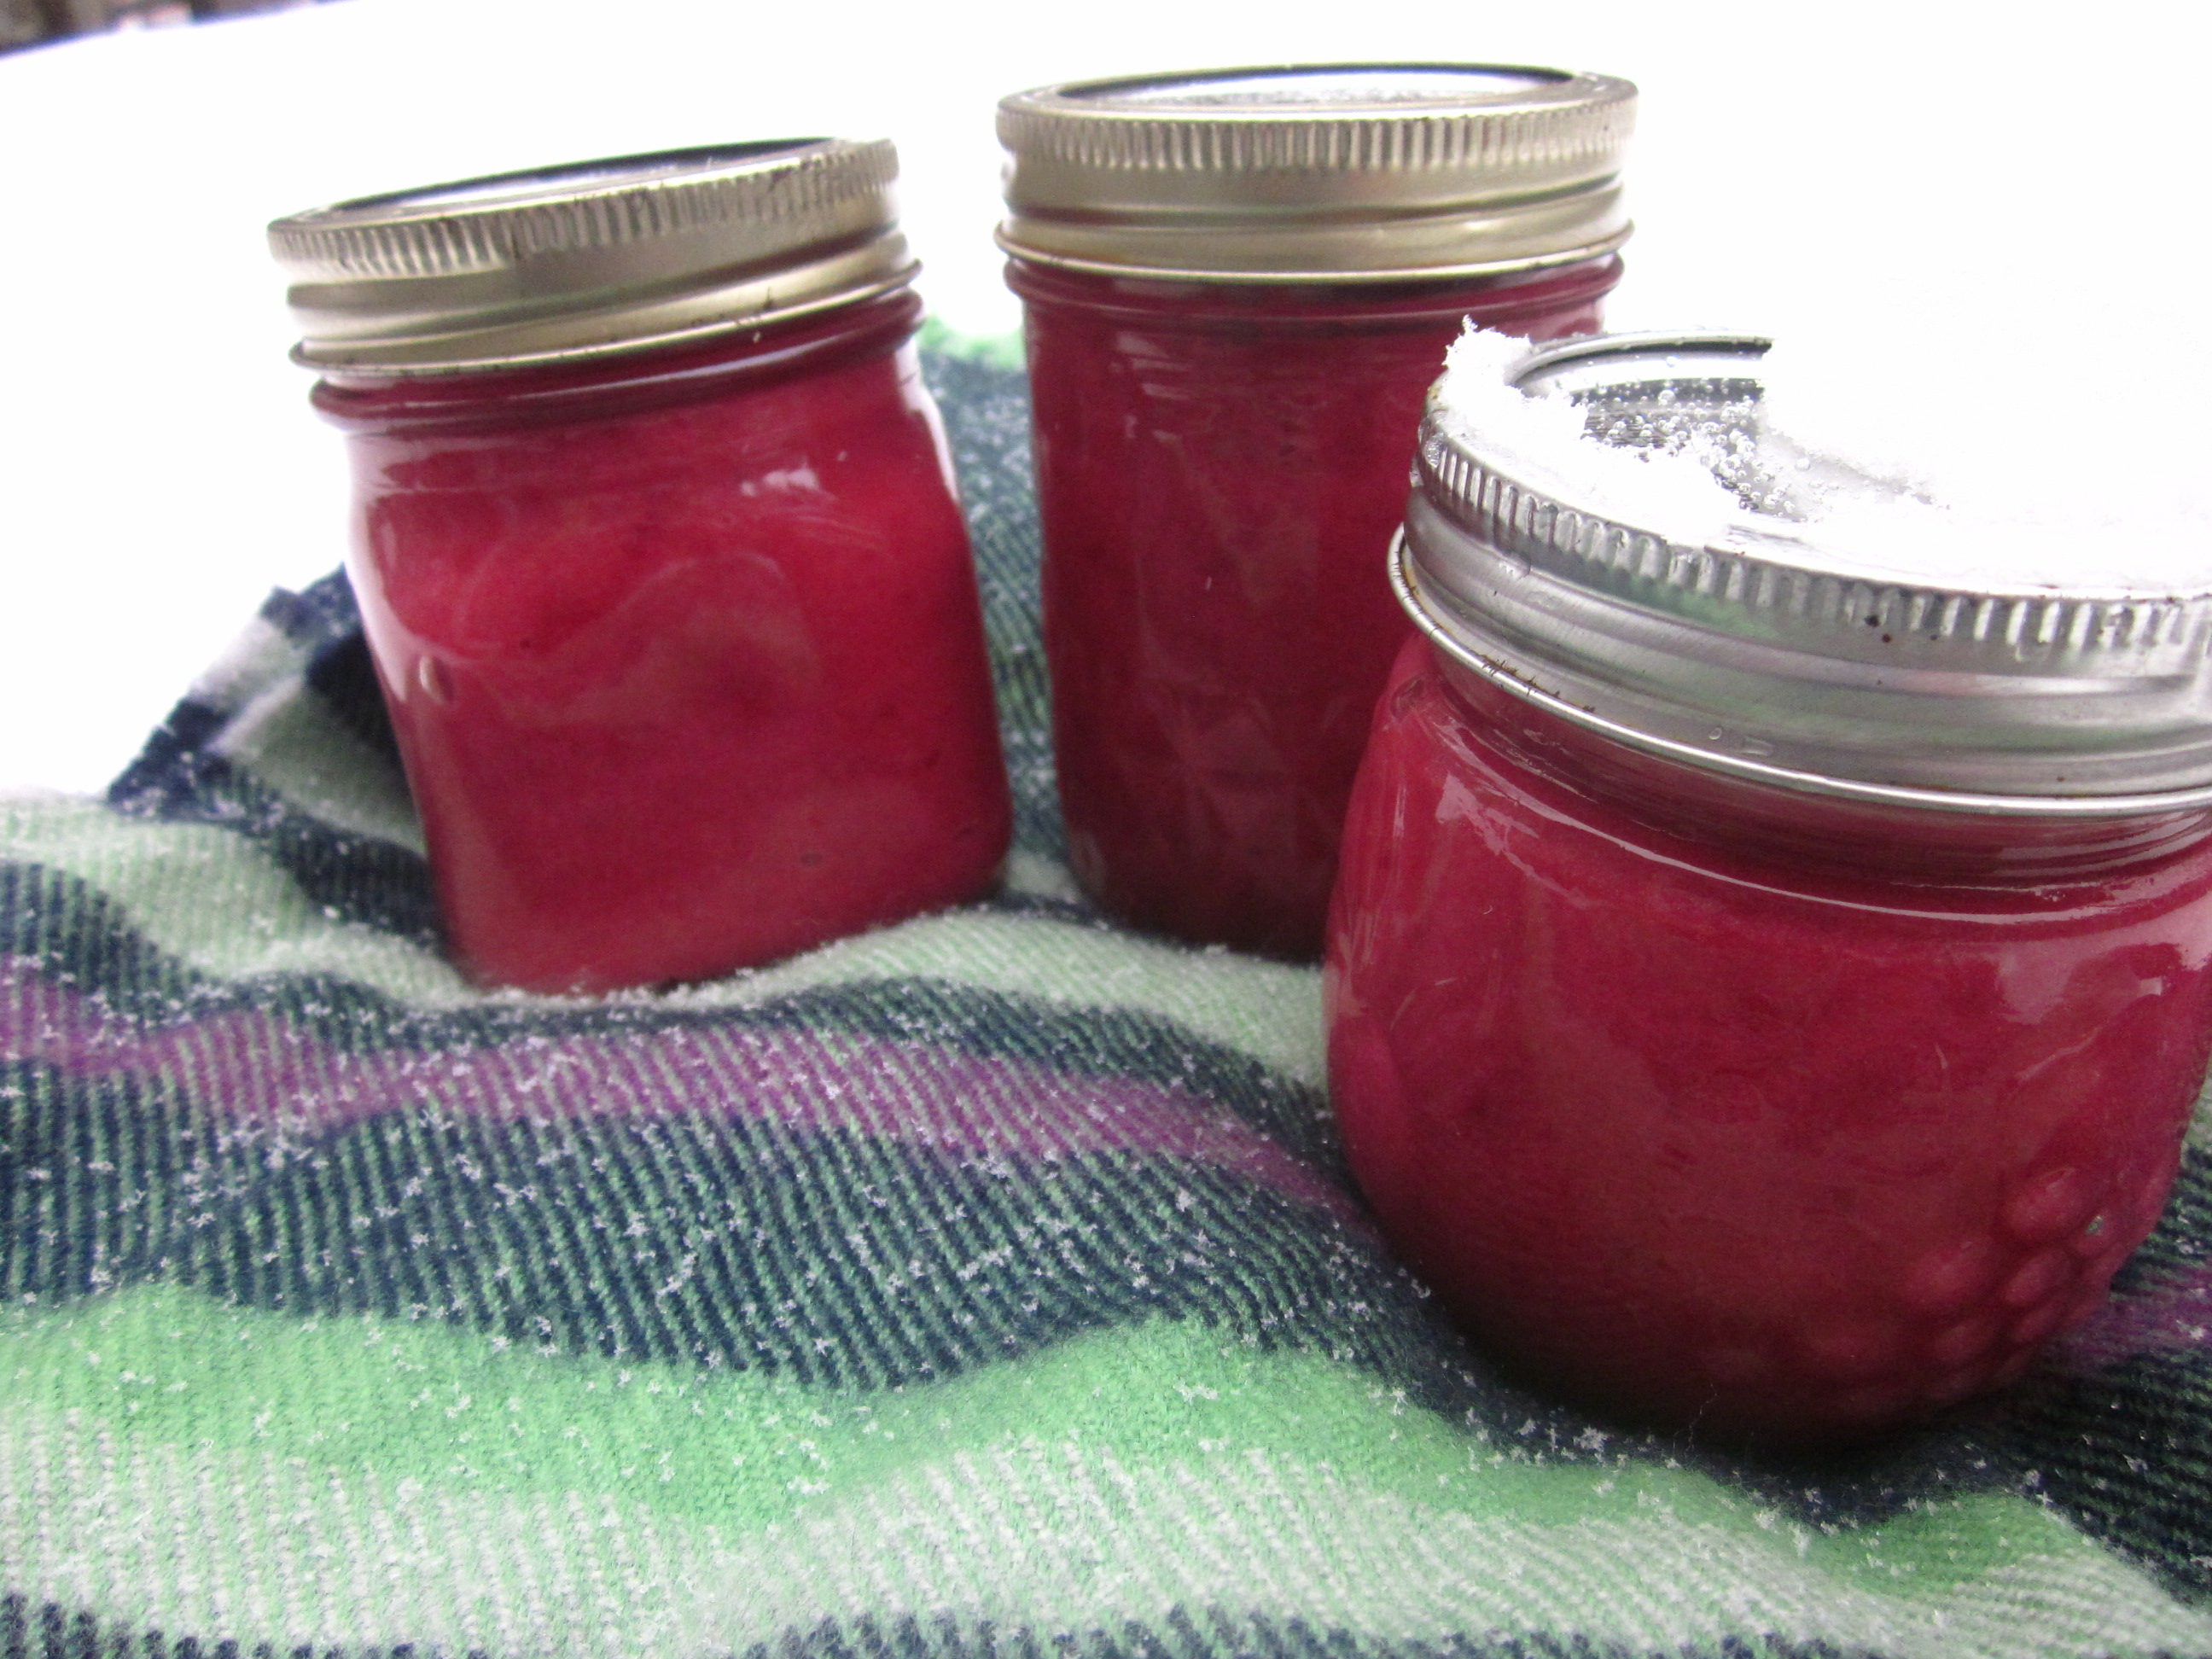
The finished product must be refrigerated, but freezes well in a sealed container. When you run out of the first jar, place the frozen one in the refrigerator overnight to thaw. I haven’t noticed a textural difference, but if you find it to be runny after thawing, repeat step two of the recipe below until you achieve your desired texture.

20180811_135545.jpg

Recipe

  • 2 large Lemons, zested and juiced
  • ¼ – ½ c Granulated Sugar, depending on your taste OR 1/3 c Honey
  • 3 Egg Yolks
  • 6 Tbsp Butter, cubed

Procedure

  1. In a medium sized sauce pot, whisk together sugar, lemon juice and zest, and egg yolks until the mixture turns pale yellow.
  2. Cook, stirring constantly, until the mixture thickens enough to coat the back of a spoon without running together.
  3. Remove from heat and stir in butter until the curd is smooth and even.
  4. Transfer to containers and refrigerate or freeze.
  5. Enjoy!

Lemon Curd Title Card

That’s it for now gentle readers. Give it a whirl!

Maple Syrup

Hello readers!

Fall has come to the hinterlands – leaves are dropping, winds are blowing, and the temperature swings from hot to cold and everywhere in between in a day. I recently got to thinking about maple syrup, and my experiences with it at the farm. We produced about twenty gallons of the sweet stuff this spring.  I was lucky enough to spend a couple of days (and a night) in our sugar bush and thought I’d tell you all about it. Interested? Let’s go!

20150330_170137

The Trees

The best trees for tapping are, of course, sugar maples – the ones that have the really brilliant colors in the fall. Other maples – red, black, silver, or even box elders – can also be used. The trees need to be at least eight inches in diameter and in good health to be tapped. Trees larger than twelve inches around can have two taps.

20150330_144840

Sap

Sap is produced by the xylem, or new wood, in the tree. The purpose of the xylem is to transport water and nutrients throughout the tree. During winter, trees store starches in their roots by converting them to sugars. Once things start to thaw out, the tree absorbs moisture and dissolves the sugars, forming sap. When the nights are below freezing and the days are above it, the sap migrates up to the branches and we can tap it, starting syrup season. The season ends when the trees bud and the sugar concentration in the sap changes.

20150330_142942

Tapping

Tapping is done with a drill and a spile. A new hole is drilled each year, then washed out and given a spile. At the farm we hang buckets or sap bags from the spile, but large operations can use vacuum tubing for more efficiency.


20150330_143055

20150330_143739.jpg

I like our method better – the vacuum tubing makes the woods look like some sort of bad science fiction set. Anyways, as the sap drips into the bucket or the bags we go around collecting it, usually in larger buckets, then filter it before adding it to the evaporator. Ideally, collection is done at least once a day, since the sap can go moldy if you let it sit.

Gross.

20150330_144859

Evaporating 

It takes about forty gallons of sap to make one gallon of syrup. Think about that – a forty to one ratio. No wonder real maple syrup is so expensive!

We bring the sap to our sugar shack and filter it before adding it to the evaporator. The evaporator is basically just a big metal tub with a tap set on top of a big wood burning stove. We save the ashes from the stove and put them around tomatoes and eggplants to keep bugs away during growing season.

20150330_14482620150330_144830

Some evaporators are much fancier, with shaped bottoms, seals, and pressure gauges that automate the process. Sometimes we put another smaller tub on top for more filtration, but not always. We also have a smaller propane fired evaporator for finishing the syrup, since the big one can burn the syrup in the blink of an eye if you aren’t paying attention.

20150330_144914

The sap is boiled until it reaches the right density – we use a hydrometer to test it. Once it reaches 66° on the Brix Scale, it’s done! Kill the heat and it’s onto bottling!

20150330_153531.jpg

Bottling 

Once it reaches the correct density, we drain the syrup off into a smaller pan with a filter. The really, really hot (don’t touch it – it’ll burn you!) goes through a filter in the pan, then through a cheesecloth filter and into the bottle. The bottles are sealed and voila! The syrup is now ready for the market. Pretty cool, right?

I think so.

So, back to syrup itself – maple syrup has a cool and complicated history. It was first made by indigenous peoples in the northeastern part of North America. Why northeastern? Temperature – it has to freeze at night for the sap to run. The indigenous peoples concentrated the sap by putting hot stones into buckets of sap to heat it, or allowing it to freeze overnight and getting rid of the water that froze on top. When Europeans arrived, they boiled the sap in large kettles over a fire. The first evaporator was patented around the time of the Civil War.

A couple of interesting facts –

Most of the world’s maple syrup comes from Canada. The other major source is the United States.

Abolitionists tended to use maple syrup and maple sugar over cane sugar, as cane sugar in the United States was usually produced using slave labor.

During World War Two, cane sugar was rationed and families were urged to use maple syrup and sugar instead, and to produce their own if they lived far enough north. Recipe books were even printed and distributed to help families make the switch.


Sunshine Meringues

Hello Readers!

Cold weather and grey skies got you down? I have just the solution:

Admittedly not the best picture, but hey - It tastes delicious!

Admittedly not the best picture, but hey – It tastes delicious!

Sunshine Meringues!

Now, I’m not much for frilly names and froufrou titles (unless it’s the band), but I really think “sunshine” describes these treats perfectly.

So, what are they?

Simply meringues filled with pineapple curd! It’s an excellent use for the curd and the egg whites left over when making it. It’s light and crispy on the outside and creamy and tart on the inside – perfect for parties or just dessert.

Meringues are very simple to make. You just have to make sure it’s just egg whites with no yolk, or the meringue won’t form properly.

The pineapple curd recipe is from Alaska From Scratch, and boy, is it amazing!

Onward!

First, make your nests. Make one recipe basic meringue and place it in a pastry bag. You can also use a plastic bag with the corner cut off. I like using a pastry tip, too, but you don’t have to.

IMG_0256

Next, pipe out circles on a parchment paper lined baking sheet. Make sure to make them solid circles. Pipe another circle on top of each one, leaving the center open.

IMG_0254

Bake for one and a half hours at 275°F. Turn the oven off and let them stay in the oven another hour with the door closed. Remove and keep of the cookie sheets for another two hours before filling.

IMG_0268

While the meringues are baking,prep your pineapple curd. I used canned pineapple for this, but if you have a fresh pineapple use that!

In the bowl of a blender or a food processor, puree pineapple until you get a texture you like. Toss it into a saucepan. Over low heat and cook until bubbling.

IMG_0230

Whisk together egg yolks, sugar, corn starch, and salt. Temper the mixture with small amounts of the hot pineapple puree, whisking to keep the egg yolks from curdling. Once tempered, whisk into the remaining pineapple puree.

IMG_0235

Cook mixture until it comes to a boil. Remove from heat and stir in butter. Transfer to clean storage jars.

IMG_0238

Once the meringue nests have cooled, use a pastry bag or a spoon to fill the centers with pineapple curd. Keep refrigerated until ready to serve.

Sunshine Meringues

Ingredients

1 recipe Pineapple Curd

1 Recipe Basic Meringue

Procedure

  1. Preheat oven to 275°F. Line a cookie sheet with parchment paper.
  2. Transfer meringue to a pastry bag. Pipe out circles onto the parchment paper. To form the nest walls, pipe a second layer of circles on top, making sure to leave the center open.
  3. Bake for 1 ½ hours, then turn the oven off.  Keep meringues in the oven another hour with the door closed. Cool on cookie sheets another 2 hours.
  4. Using a spoon or pastry bag, fill nests with pineapple curd. Refrigerate until ready to serve.
  5. Enjoy!

Pineapple Curd

Ingredients

1 c Pineapple Puree

1/3 c Sugar

3 Egg Yolks

2 Tbsp Corn Starch

2 Tbsp Butter

Pinch Salt

Procedure:

  1. Heat pineapple curd in a large saucepan until bubbling.
  2. Whisk together egg yolks, sugar, cornstarch, and salt. Temper and whisk into the pineapple puree. Heat until it comes to a boil and remove from heat.
  3. Stir in butter.

Cooking Lessons from Kylie: Basic Meringue

Hello Readers!

I’ve been teaching high school cooking classes lately, and it’s gotten me thinking about basic cooking skills. Specifically, skills that people think are difficult and make a point to stay away from, but are actually super easy.

Number one on this list is meringue. Mostly because I have a ton of egg whites sitting around due to making curds, but hey, it’s as good a starting point as any!

IMG_0278

Oh, how I love meringue – it’s dreamy appearance, melt in the mouth texture, and the overall versatility of the medium all combine to make me smile. And a smile is always a good thing, right?

Simple!

So I decided to share the recipe I use and break it down. Follow along and I bet you’ll fall in love with it too!

First start with egg whites. You want them to be completely free of yolk or the meringue won’t form. Why? Let’s ask my food science background:

When making meringues, the most important part of the egg white is the proteins found in it. Proteins are made of hydrophilic (water loving) and hydrophobic (water fearing) molecules – basically, one attracts water and one repels it. When you start beating air into your egg whites, the hydrophilic molecules jump up and cling to the water present in the egg white (about 90 percent of it!) and the hydrophobic molecules run straight into the waiting arms of the air molecules. This helps form air bubbles and puffs the meringues up. However, if the egg yolk, which contains fat molecules, is included, the fat molecules butt in and stop the bubbles from forming. No bubbles, no meringue.

Add your egg whites to a metal bowl. Don’t use a plastic one, because no matter how well you cleaned it last time you used it, it might still have a couple of fat molecules hanging around. Next, add in cream of tartar or another acid.

Remember those bubbles I was talking about before? Well, as we all know, bubbles eventually pop, which will lead to a deflated and gross meringue. Add an acid, such as cream of tartar, and bam – stable, no pop bubbles.

Look close! Can you see the bubbles?

Look close! Can you see the bubbles?

Beat the egg whites and cream of tartar together at high speed until foamy. It’ll take a while, but be patient. The wait is well worth the reward.

IMG_0243

Once your meringue has reached a nice foamy stage, start adding sugar. I recommend going one tablespoon at a time. Keep beating until the mixture is thick, glossy, and forms stiff peaks. To determine if your meringue is ready, give it a stir and lift up the whisk or beater. If the resulting folds in on itself but has a nice pointy tip, it’s ready. Don’t over beat!

The picture below isn’t quite there yet.

Not Ready

This is better:
IMG_0249Once your meringues have reached this stage, transfer (gently!) to a pastry bag. I don’t have a pastry bag, so I use a Ziploc with the corner cut out. If you have a pastry tip, you can use that to make it pretty, but it’s not necessary. Pipe your meringues out onto a parchment paper lined cookie sheet and bake. Don’t peek! Turn the oven off after an hour and a half at 275°F, then leave them in for another hour or so. Meringues are sometimes called “forgotten cookies” because they can be left in the oven for a while after finishing.

IMG_0255

As it says above, this is a recipe for basic meringues. You can add flavoring (ginger, anyone?), mini chocolate chips, dried fruit, nuts – It’s an open canvas! This can also be used as a base for Pavlova, Baked Alaska, Meringue Pies, and Eaton Mess, among many tasty others.

Enjoy!

IMG_0273

Basic Meringue

Ingredients

3 Egg Whites

¼ tsp Cream of Tartar

¾ c Sugar

Procedure

  1. Preheat oven to 275°F. Line a cookie sheet with parchment paper,
  2. In a medium bowl, beat together egg whites and cream of tartar on high speed until foamy.
  3. Beat in sugar, 1 tablespoon at a time and continue beating until stiff peaks form and the meringue is glossy. Do not under beat.
  4. Transfer meringue into a pastry bag or a Ziploc bag with a corner cut off. Pipe out as desired.
  5. Bake for 1 hour and 30 minutes. Turn off oven and leave door closed 1 hour. Finish cooling outside the oven for 2 hours.

Coconut Cashew Chicken

Hello Readers!

The farm I work at recently gave away some of the older laying chickens, and that got me thinking about chicken. Not just eggs, but the meat.

Now, I don’t cook a lot of meat. Mostly, it is because I am lazy and by the time dinner comes around, vegetables seem like the quicker option. Also, buying meat seems like a pain in the neck to me – once again – Vegetables!

However, like I said above, I work on a farm. It’s a nice farm, part of a park district. We raise chickens for meat and eggs, sheep for meat and wool, pigs, turkeys, and beef cattle. I’m the local food coordinator, so I do more with the gardens and community outreach, but I still like hanging out around the animals.

IMG_0625

But back to chicken.

This is a recipe I stumbled upon on Carlsbad Cravings this summer and fell in love with! It’s tropical and tasty and just what I needed at the time. And the dipping sauce is to die for – I admit I ate most of it with a spoon.

IMG_0286

I will admit that this recipe made me extremely grateful to have a food processor-  press the button and whir thunk bam – ingredients are chopped or pureed in seconds.

Onward!

First combine the cashews and the coconut in the bowl of a food processor. You could also use a blender, or a knife if necessary. Pulse until the mixture forms small chunks.

IMG_0264

Next prep your dredging station. Place the flour in a shallow dish and set in spot number one. Depending on which hand you work with, this will be the farthest right or left. Combine eggs and lime juice in a separate bowl and place in spot number two.  The coconut/cashew mixture goes in another shallow dish with the bread crumbs, brown sugar, and spices. Put a parchment paper lined baking sheet at the end of the line.

IMG_0267

Working one at a time, dip the chicken in the flour, then the eggs, and then the breading. I’ve found that using one hand for the flour and egg and one hand for the breading works best and doesn’t result in gooey hands. Gross.

Bake the chicken at 400°F for about twenty five minutes, or until the juices run clear.

While the chicken is baking, clean out your food processor/blender/etcetera. Peel and roughly chop your mango. If you haven’t worked with mango before, my favorite chef, Alto Brown has a pretty good tutorial here. Put the mango chunks into the bowl of the food processor and puree with the lime juice, cider vinegar, and spices.

IMG_0282

Enjoy!

Coconut Cashew Chicken

Ingredients

Chicken

2 lbs Chicken Tenderloin

2 eggs

1 Tbsp Lime Juice

¾ c Whole Wheat Flour

1 c Cashews, roasted without salt

¾ c Shredded Coconut

1 c Bread Crumbs

1 Tbsp Brown Sugar

1 ½ tsp Garlic Powder

1 tsp Onion Powder

1 tsp Cumin

1 tsp Salt

½ tsp Pepper

1 tsp Cayenne Pepper

Mango Honey Dip

2 Mangos, peeled and chopped

¼ c Honey

2 Tbsp Lime Juice

2 Tbsp Cider Vinegar

½ tsp Cumin

4 Cloves Garlic

3 Green Onions, chopped

2 tsp Red Chili Flakes

Procedure:

  1. Preheat oven to 400°
  2. In the bowl of a food processor, mix together cashews and coconut. Pulse until roughly the size of the bread crumbs.
  3. Combine coconut and cashew mixture, bread crumbs, brown sugar, and spices in a shallow dish and stir together to combine to form the breading.
  4. Place flour in a separate shallow dish and place next to the breading.
  5. Place eggs and lime juice in a bowl and whisk to combine. Place bowl beside the flour. You should now have an assembly line set up of flour, eggs, and breading.
  6. Working one at a time, dip chicken tenderloins in the flour, then the egg, then the breading and place on a parchment paper lined baking sheet. Press the breading gently against the chicken to make sure it sticks.
  7. Once each tenderloin has be coated, place in the oven and bake for about 25 minutes, or until juices run clear.
  8. While the chicken is in the oven, place mango into the bowl of the food processor and puree.
  9. Add honey, lime juice, cider vinegar, and spices and puree again. Pour into serving bowls.

Cranberry Curd

IMG_0748 (2).JPG

Winter has arrived in Minnesota! Well, more slammed into us then arrived – I got back from Seattle late Sunday and woke up to snow on Monday. That’s what we get in exchange for such a beautiful fall. Oh well – winter has its perks too. And I missed most of last winter while I was in South Korea, so I’m excited for this one.

IMG_8518

Like cranberries!

I love cranberries – their color, their taste, everything about them. Did you know that they actually get less sweet as they ripen? Or that a good cranberry bounces if you drop it? Cool stuff, right?

Now, the first thing that pops into my head when I think cranberry is, well, cranberry sauce. But it isn’t Thanksgiving yet, and I wanted something different. Then I stumbled across it – cranberry curd! Simple, Delicious, and beautiful – Maybe I’ll make a big batch for the holidays!

IMG_0748
Curds are some of my favorite things to make – easy, fast, and delicious! This recipe is one I found on Kitchen Confidante. I’m classifying this as an “in progress recipe” for me, so expect an update later this winter.

Onward!

First prepare the cranberries. Combine them with water in a large saucepan over medium heat and allow to cook until the cranberries have popped.

While the cranberries are cooking, combine your eggs and sugar and whisk until light yellow. Set aside.

After the cranberries have popped, you’ll need to strain them. I used an old fashioned apple sauce strainer and a wooden pestle, but you could use a conventional strainer with small holes or cheese cloth if you’re really patient. Make sure to scrape the outside of the strainer to get as much of the puree off as possible.

Transfer the puree back into your saucepan and place over medium heat. Once it starts bubbling, use a spoon to transfer a small amount to the egg mixture and whisk quickly to combine. Keep whisking so the eggs don’t cook – this is called tempering. Repeat until the eggs are warm.

Combine the egg mixture with the cranberry puree and whisk quickly together. Keep whisking until the curd starts to thicken. It’s ready for the next step when it coats the back of a wooden spoon.

Once the curd has thickened, remove from heat and stir in the butter. Transfer to whatever container you want to store it in and enjoy!

Cranberry Curd 2

Cranberry Curd
Ingredients:
3 c Fresh or Frozen Cranberries (about one bag)
¾ c Water
4 Egg yolks
2 Whole Eggs
1 c Sugar
2 Tbsp Turbinado Sugar
6 Tbsp Butter

Procedure:
1.Combine water and cranberries in a large saucepan over medium heat. Cover and let cook until cranberries pop.
2.While cranberries are cooking, combine egg yolks, eggs, and sugars. Whisk until pale yellow.
3.Once cranberries have popped, pour them into a strainer over a large bowl. Use a rubber scraper or a pestle to push as much of the cranberry puree through the strainer as possible. Discard leftover skins and seeds and transfer puree back to saucepan.
4.Bring cranberry puree back up to temperature.
5.Add a spoonful of hot cranberry puree to egg mixture and whisk vigorously to prevent the eggs from cooking. Repeat until eggs are tempered and add the mixture to the saucepan.
6.Cook over medium heat until the curd coats the back of a wooden spoon. Remove from heat and stir in butter.
7.Pour into jars and refrigerate, freeze, or can.
8.Enjoy!

Freeform Strawberry Blueberry Pie

Hello Readers!

It’s summer, and summer at my house means PIE!

IMG_0187

I love pie – I personally think it’s better than cake. Well, when made the right way with fresh fruits, or in the case of rhubarb, veggies, anyway. I do make an exception for pumpkin pie.

Anyways, blueberries and strawberries have been rolling into the house, and I stumbled upon this delicious recipe in one of the Sunday paper inserts. The original recipe can be found here.

IMG_0190

I like that the pie crust is free form and doesn’t overwhelm the fruits, plus, the crust is made with lemon juice and lemon zest! This recipe could be easily modified to use other types of fruits or zests in the crust – so I predict many variations of it gracing my table this summer. It’s also quite small, so it’ll go fast!

Onward!

Delicious!

Delicious!

Start by making your pie crust. I used a food processor, but you could easily make the dough by hand with a pastry blender or a pair of forks.

In a measuring cup, combine lemon juice with enough ice water to make ¼ of a cup. Keep cold and set aside.

In a medium sized bowl, combine lemon zest, flour, and salt. Add in butter in small chunks and mix with a food processor or pastry blender until it resembles coarse meal with pea sized chunks. Drizzle the lemon water in and pulse or stir until the dough just comes together.

Form the dough into a flattened disk, wrap in plastic wrap, and chill for at least half an hour.

While the dough is chilling, preheat your oven to 450°F. Prepare an eight inch round baking pan by greasing and lining with parchment paper. Set aside.

In a large mixing bowl, combine strawberries and blueberries with 2 Tbsp each of flour and sugar. Toss to combine and set aside. You could also add in some additional lemon zest here.

IMG_0195

Once dough has chilled, roll it out into a twelve inch round. Place the dough gently into the baking pan, with edges going over the sides. Pour the berry mixture into the center of the soon-to-be crust, making sure to keep a two inch border around the edges.

IMG_0199

Fold the dough over the berries, pleating the edges to keep them inside. Brush dough with egg white, and sprinkle the entire pie with turbinado sugar.

IMG_0202

Place baking dish on a cookie sheet to prevent any leaks into the oven, and bake at 450° for 15 – 25 minutes, or until the crust is golden.

Serve warm or at room temperature. Add ice cream if you’d like and enjoy!

IMG_0211

Freeform Strawberry and Blueberry Pie

Ingredients:
For the Crust:

Juice and Zest of one Lemon

1 ½ c All Purpose Flour

½ tsp Salt

½ c (1 stick) Butter

For the Filling:

1 lb Strawberries, hulled and sliced into fourths

1 ½ pints Blueberries

2 Tbsp Sugar

2 Tbsp Flour

1 ½ Tbsp Turbinado Sugar

1 large Egg White


Procedure:

  1. Combine the lemon juice with enough ice water to make ¼ cup lemon water.
  2. In a large mixing bowl, or the bowl of a food processor, combine flour, salt, and lemon zest. Add in butter in small chunks and mix until pea sized lumps remain.
  3. Drizzle in lemon water and mix until dough just comes together.
  4. Scrape dough onto your work surface, form into a flattened disk, and wrap in plastic wrap. Chill for at least a half hour.
  5. Prepare an 8” round baking pan by greasing and lining with parchment paper. Set aside.
  6. In a large mixing bowl, combine remaining 2 Tbsp flour, 2 Tbsp Sugar, and fruit. Toss to combine.
  7. Place chilled dough on a floured surface and roll out into a 12” round. Transfer to baking pan.
  8. Pour berry mixture onto the pie dough, leaving a two inch border around the edges. Fold crust over berries, pleating to make sure the berries stay inside.
  9. Brush dough with egg white. Sprinkle turbinado sugar over dough and fruit.
  10. Place baking pan on a cookie sheet and bake at 450°F for 15 – 25 minutes, or until crust is golden.
  11. Serve hot or at room temperature, and enjoy!


Cherry Couscous Salad

Hello readers!

Due to my sweet tooth, I’ve been posting all sweet dishes. I think it’s time for a change, so I’m going to write about my favorite summer salad.

Cherry Couscous Salad.

It sounds a bit strange, but bear with me – it’s delicious!

The salad takes advantage of the abundance of cherries available right now, and turns them from a snack or dessert into a full-blown side dish (or main dish, depending on how you serve it) to delight your fellow tablemates.

I found this dish last year while searching for a salad that I would actually like (dressings are not my thing. Ick), and found this salad with a dressing that actually sounded appetizing. So I gave it a try and loved it! I hope you’ll love it too. I found the recipe on a blog called “A Cozy Kitchen” – check it out!

Onward!

Start by preparing your ingredients. I had no chickpeas on hand while preparing this, so I left them out.

Couscous is simple to prepare – for this recipe, bring 2 ½ cups water to boil in a medium sized saucepan. Add in your couscous, allow to boil, then cover and remove from the heat. Allow to stand five minutes, then uncover, fluff with a fork, and set aside. The Kitchn has a handy tutorial for preparing couscous here.

Pit the cherries and cut into fourths. This might take a while, but be patient – it’s worth it!

Bright red and delicious!

Bright red and delicious!

Lay your about six or seven spinach leaves on top of one another and roll them up. Slice into strips – this is called a chiffonade, and makes slicing up greens super easy.

Chop the onions – they don’t need to be exactly the same size, but should be fairly even.

IMG_0178

Toast the almonds either on a baking sheet in the oven for seven to ten minutes or in a frying pan over medium heat, stirring every so often until you can smell them. Remove from heat and stir a few times to keep them from burning.

The almonds should turn a nice golden brown when done.

The almonds should turn a nice golden brown when done.

In a large bowl, toss together the chopped spinach, onion, cherries, chickpeas, and almonds. Set aside.

Color!

Color!

In another mixing bowl, whisk together yogurt, minced garlic, olive oil, and lemon juice. Toss with the cherry mixture.

Stir in cooled couscous, making sure the salad is thoroughly combined.

IMG_0214

Chill for half an hour and enjoy!


Cherry Couscous Salad

 Ingredients:

½ c Sliced Almonds, toasted

2 ½ c Couscous, uncooked

2 c Spinach Leaves, sliced into strips

2 c Cherries, pitted and sliced into fourths

1 15 oz can Chickpeas, drained and rinsed

½ of a small Red Onion, chopped

¼ c Plain Yogurt

3 Tbsp Olive Oil

2 Tbsp Fresh Lemon Juice

3 cloves Garlic, minced


Procedure:

  1. In a saucepan, prepare couscous according to package directions – usually a 1:1 ratio of couscous to water. Once cooked, set aside and allow to cool.
  2. In a large bowl, toss together almonds, cherries, spinach, onion, and chickpeas. Set aside.
  3. In a small mixing bowl, whisk together yogurt, olive oil, lemon juice, and garlic until smooth.
  4. Pour yogurt mixture over cherry mix and toss to combine. Add in couscous, stir to combine.
  5. Refrigerate for half an hour and serve.
  6. Enjoy!

Blueberry Breakfast Bake

Happy Independence Day!

Here in the Northland we celebrate the 4th of July with parades, fireworks, and good food – pretty typical, right? As I’m a bit too old for the children’s parade in my hometown and haven’t quite mustered up the desire to participate in the fun run, I decided to make a breakfast bake to celebrate. Now, at my house, breakfast bakes are usually savory. However, it’s blueberry season!

I found this lovely recipe from Whole Foods, tweaked it a bit to make it my own and work with the ingredients I had on hand, and my new favorite breakfast was born.

Simple and Delicious!

Simple and Delicious!

Onward!

First, grease a 9X13” baking dish. Cut your baguette into ½ inch cubes. The original recipe calls for a day old baguette, but I used one I had stashed in the freezer and it turned out just fine. Make sure to let it thaw a bit before slicing.

The y don't have to be identical, but should be fairly even in size.

The y don’t have to be identical, but should be fairly even in size.

Place half of the bread cubes into the baking dish and add in half the blueberries. Try to make sure that the berries are evenly distributed. Set aside.

IMG_0134

In a large mixing bowl, combine the cream cheese and sugar and beat until fluffy. Add in your sour cream, vanilla, spices, and milk until smooth. Scrape the sides several times to ensure even mixing.

Pour half the cream cheese mixture over the bread and blueberries, then top with the remaining bread and berries. Pour the rest of the mixture over the top.

IMG_0143

Cover and chill overnight.

In the morning, take your unbaked breakfast bake out of the fridge and let sit for a half hour to warm up.

The bread should have soaked up plenty of the custard mixture.

The bread should have soaked up plenty of the custard mixture.

Bake at 350°F for 30 – 45 minutes, or until golden brown and a knife inserted in the middle comes out clean.

IMG_0158

Let stand a few minutes before serving and enjoy!

IMG_0161

Ingredients:
1 8 oz Baguette, preferably day old

1 ½ pints Blueberries

8 oz Cream Cheese, at room temperature

6 Tbsp Turbinado Sugar

6 Eggs

¾ c Sour Cream

1 ½ tsp Vanilla Extract

¼ tsp Cinnamon

¼ tsp Ginger

¼ tsp Cardamom

1/8 tsp Star Anise

1/8 tsp Allspice

½ c Milk


Procedure:

  1. Cut Baguette into ½ cubes. Place half the cubes in a greased 9X13” baking dish. Set the other cubes aside for now. Sprinkle half of the blueberries across the baking dish.
  2. In a large mixing bowl, beat together cream cheese and sugar until fluffy. Mix in eggs, sour cream, spices, vanilla extract, and milk until smooth, scraping the sides of the bowl every so often.
  3. Pour half of the cream cheese mixture across the bread and blueberries. Top with reserved blueberries and bread. Pour remaining cream cheese mixture across the top.
  4. Cover and chill overnight. Remove and let sit for thirty minutes before baking.
  5. Bake a t 350°F for 30 – 45 minutes, or until the bread topping is golden brown. Garnish with additional blueberries.
  6. Enjoy!

Brown Sugar Chocolate Chip Cookies

Hello Dear Readers!

Do you ever get a craving for sweets? I know I certainly do, especially after working a shift in the pool. Something about the chlorine and the kiddos might be triggering a need for sugar. Maybe? Probably not. I do have a sweet tooth, though. So, to combat these sugar cravings, I decided to make cookies! Counterproductive? Maybe. Delicious? Totally.

Yum!

Yum!

The recipe I used is by Amy McCoy of Tiny Farmhouse. I found the recipe in her gorgeous cookbook “Poor Girl Gourmet”, but more on that later. Definitely give her a look! I like her recipe because it makes a small but delicious batch of cookies – just what I was looking for.

I’ve made a few modifications to the recipe, including adding cloves and whole wheat flour. Oh, and more chocolate, too!

Lots of chocolate!

Lots of chocolate!

Start by combining your flours in a medium sized bowls. I substituted whole wheat flour for the last two tablespoons of all purpose flour in this recipe because I like whole wheat, but you can use just all purpose if you want.  Add in baking soda, salt, and cloves and set aside.

In a large mixing bowl, combine your butter and sugars. Turbinado sugar has a larger grain than regular granulated sugar, so the texture of the dough will be slightly grainer. Don’t worry though – the graininess disappears during baking and the flavor is amazing!

I cut the butter into tablespoons for easier integration.

I cut the butter into tablespoons for easier integration.

Turbinado Sugar

Turbinado Sugar

After the butter and sugars have become light and fluffy, add in your egg and vanilla. I find that vanilla is pretty forgiving, so you could add more in if you’d like.

Egg and vanilla

Egg and vanilla

Add in the flour mixture about a fourth cup at a time until well combined. I found that the dough was a little dry here, so I added in about a tablespoon of water to help it stick together. You could also use milk if you wanted to.

Now for the fun part! Add in the chocolate chips! I used half a bag of mini chocolate chips and half a bag of regular semi sweet chocolate chips, because that’s what I had laying around. You can use whatever type you want.

IMG_0062

Delicious!

Spoon onto your cookie sheets and bake at 350°F until golden brown. Mine took about 12 minutes.

If you are using two cookie sheets, make sure to rotate your pans halfway through.

About a Tablespoon's worth of dough

About a Tablespoon’s worth of dough

Allow to cool on cooling racks and enjoy!


Share and enjoy!

Share and enjoy!

Brown Sugar Chocolate Chip Cookies

1 c All Purpose Flour

2 Tbsp Whole Wheat Flour

½ tsp Baking Soda

½ tsp Salt

½ tsp Ground Cloves

8 Tbsp (1 Stick) Butter

½ c Turbinado Sugar (such as Sugar in the Raw)

½ c Brown Sugar, packed

1 large Egg

1 ½ tsp Vanilla Extract

½ bag Mini Chocolate Chips

½ bag Semi Sweet Chocolate Chips


Procedure:

  1. Preheat oven to 350°F.
  2. In a medium sized mixing bowl, combine flours, baking soda, salt, and cloves. Set aside.
  3. In a separate bowl, cream butter and sugars until light and fluffy. Add egg and vanilla extract to butter mixture, beat until well combined.
  1. Add the flour mixture into the butter mixture ¼ cup at a time, beating well and scraping the bowl in between until all the flour is mixed in. If necessary, add a small amount of water or milk if the dough is too dry.
  2. Add in the chocolate chips and stir to combine.
  3. Spoon the dough out onto two cookie sheets. Dough balls should contain about ¾ of a tablespoon of dough.
  4. Bake for 10 – 12 minutes, switching the top sheet to the bottom and the bottom sheet to the top halfway through. Cookies are done when golden brown.
  5. Remove from oven and allow to cool for a few minutes, then transfer to cooling racks.
  6. Enjoy!